How to Verify a Forex Trading Account
Why must you verify your Forex Trading Account ?
It is essential to verify your Forex Trading Account before attempting to withdraw funds, as some brokers may allow you to deposit but not withdraw until verification is complete. Therefore, it is crucial to verify before beginning any real trading. However, you can trade in a demo account without undergoing verification
What kinds of things you need to verify
The verification process may differ from broker to broker, but the overall process is similar. Typically, brokers require two or three forms of verification for account validation mainly .
Identify Verification
If you possess an ID card that is not in English, kindly email a complete translation of the ID card to the broker. Prior to sending the email, please connect to the live chat and obtain further details about their process. You may refer to our sample email for guidance.
Address Verification
To submit your application, you may provide a bank statement, credit card statement, electricity bill, water bill, telephone bill, or any other acceptable document permitted by the broker. It’s essential to ensure that all documents are in your own name, as the broker will not accept documents belonging to someone else.
In the case of digital or soft copies of the above documents, it’s important not to send them as is. Instead, you need to get a printout first and then take a clear photo of it to submit. If you send the digital copy as you received it, they will definitely reject it.
Face Identification
For some brokers, you need to verify your face though the selfie. you can see this steps also in the XM account verification process in the upcoming guide .
Depending on the broker, these steps and how to do them may differ. However, you can gain a sufficient understanding of the overall procedure through this guide
How to Verify XM Forex Trading Account – Step Guide
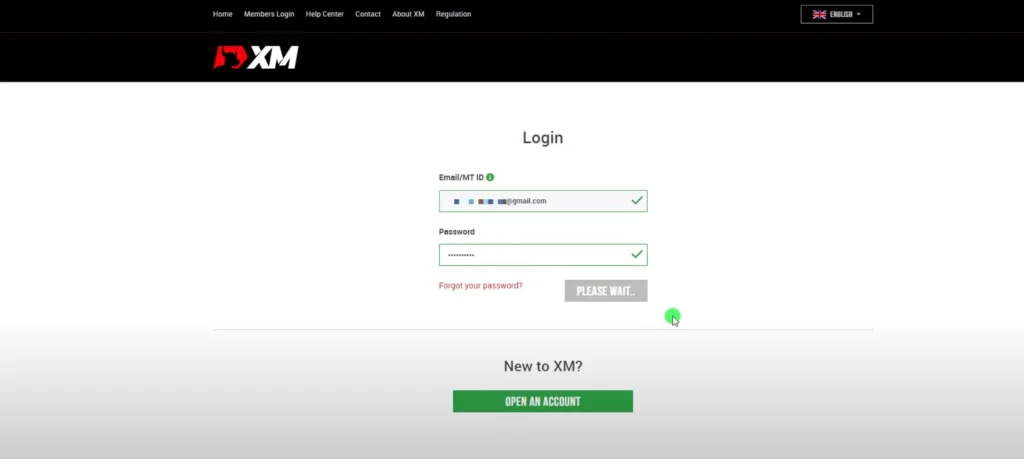
Step 1 : Log in to the XM Trading account by providing your login credentials. The account login window appears as follows
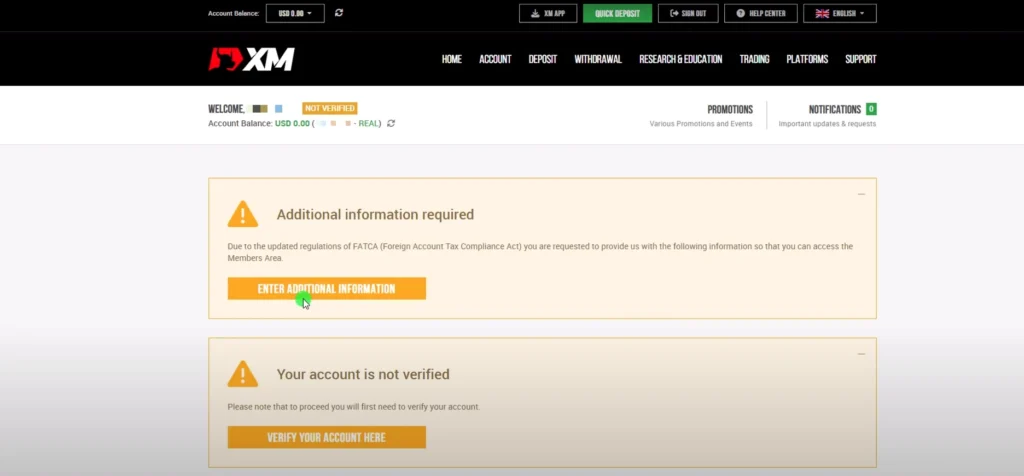
Step 2 : Once you log in, you’ll first see some messages for a few verifications as follows. Click on the “ENTER ADDITIONAL INFORMATION” button. This prompts you to enter details for tax-related purposes. Read carefully, select them, and click “SUBMIT” as shown in the second image. (In the first image, you can see a label called “Not Verified”).
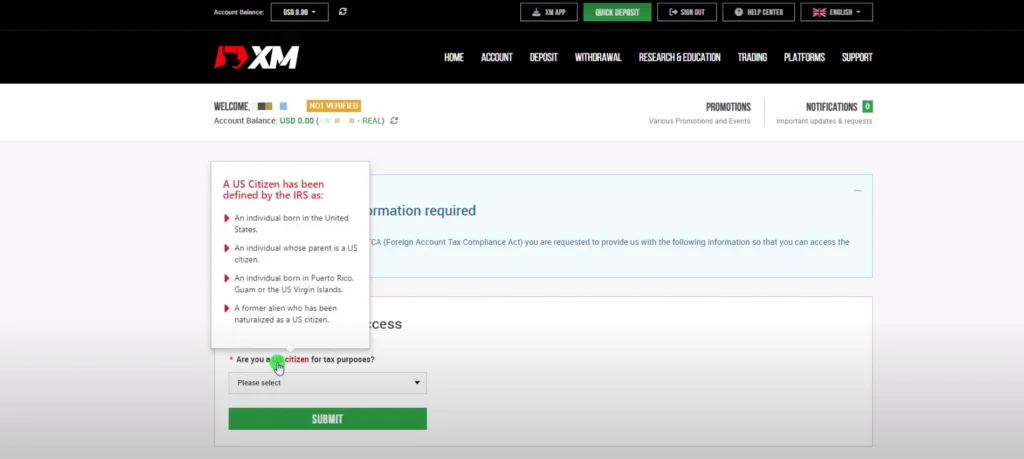
Then, when you click the “Submit” button, it will display “Please wait,” and you’ll need to wait until you proceed to the next step
Step 3 : Go back to the member area and click on the “VERIFY YOUR ACCOUNT HERE” button to begin the verification process
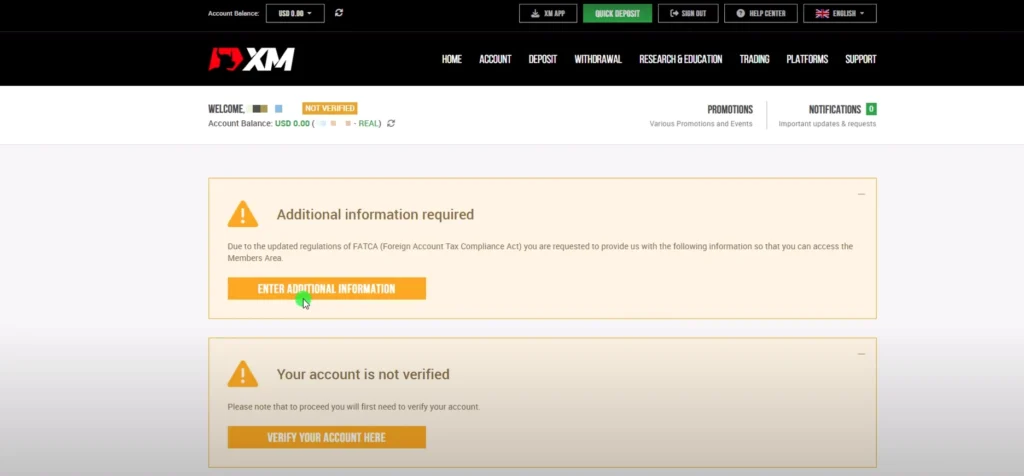
Step 4 : Then, you’ll see the upload document section. Click on the “Start Verification” button
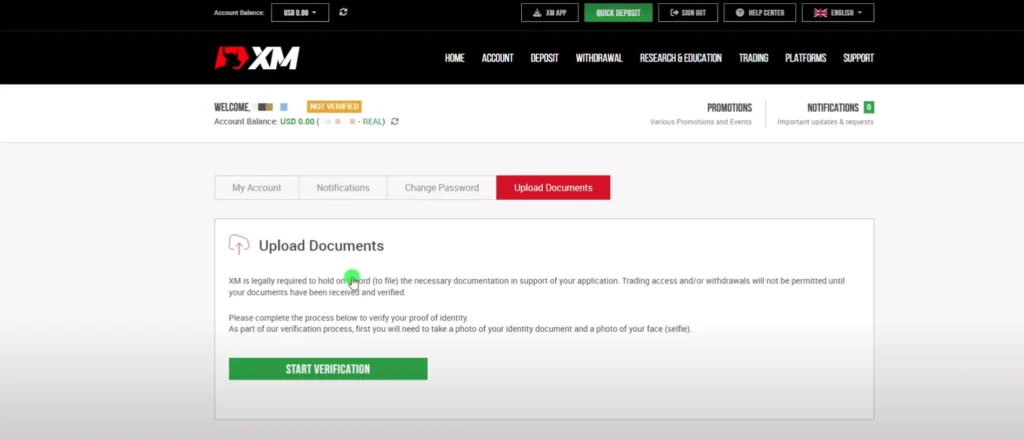
Then, you will get a popup called “Start Verification.” Click on the “Start” button on it, then wait a few seconds
Step 4 : Them you will see a popup to select the country and ID Type from
- Passport
- Driving License
- Identity Card
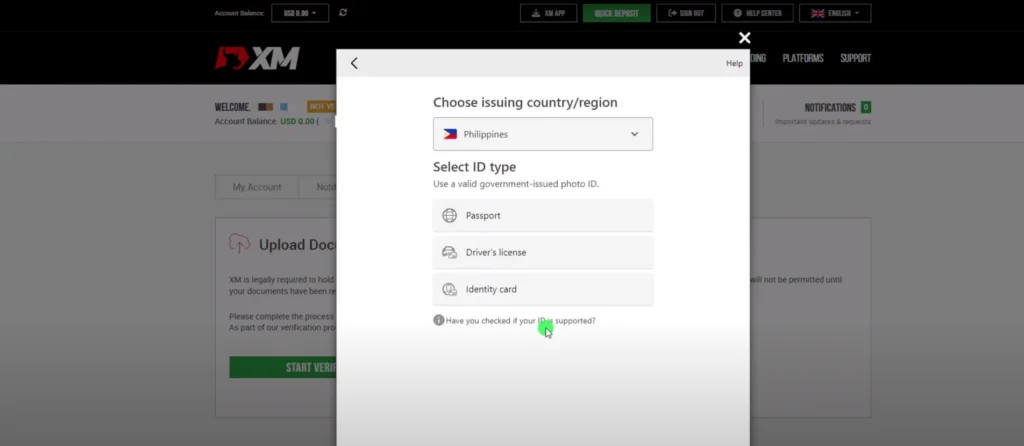
You can click on the “Have you checked if your ID is supported?” link to check for unsupported documents, as follows
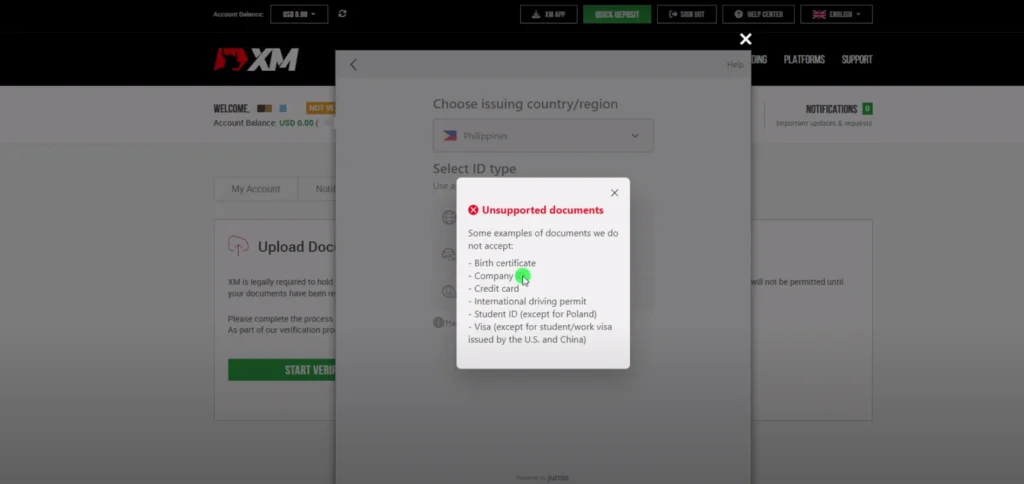
Step 5 : Here, I am going to verify using ID, but you can select any desired method. Click on the “Identity Card” option. Then, you will be directed to a popup window called “Choose an upload method,” as follows
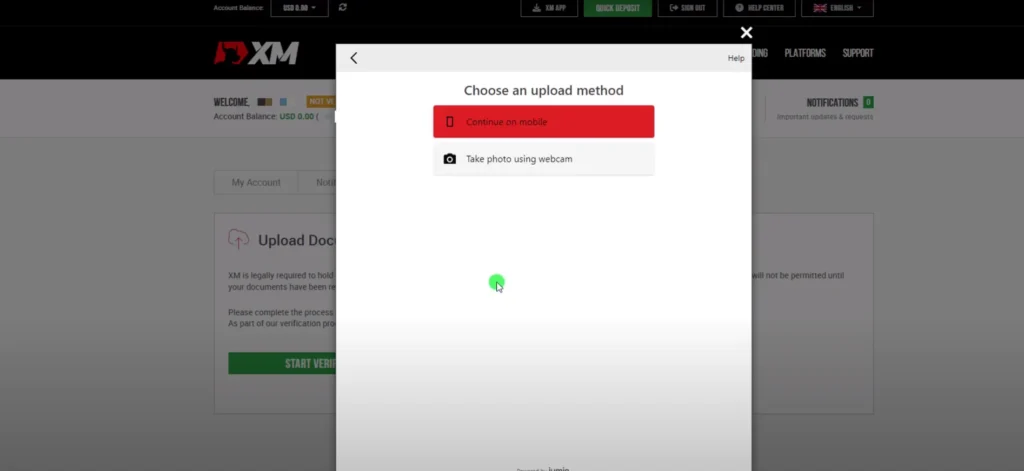
You can select any option you desire to continue the verification process. In this part, I am going to select “Continue on mobile.” Click on it
Step 6 : Then you will be directed to another popup window with the following two options
- Send link by email to the phone
- Scan QR code instead
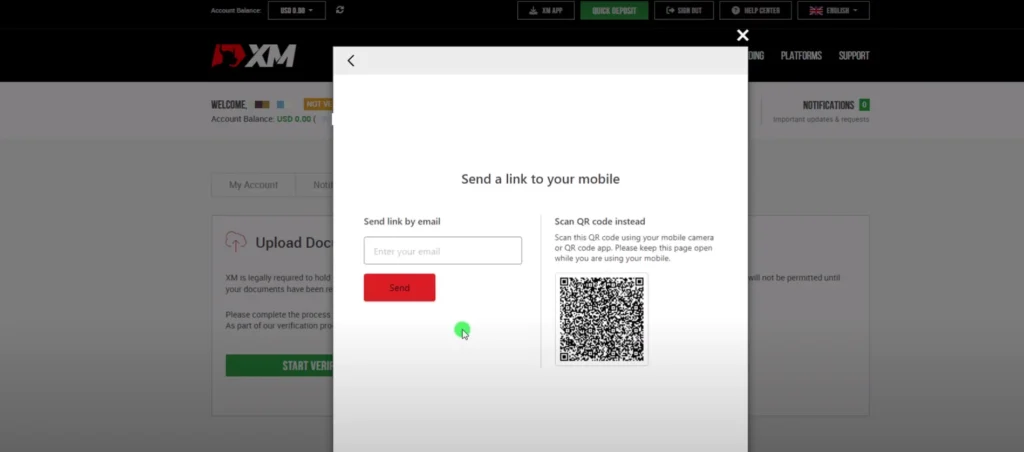
You can select any desired method from these two options. We will show you both ways. First, we will demonstrate the “Scan QR Code Instead” option. However, in this part, we are continuing with the “Send link by email” method
- Scan QR Cde Instead
Scan the QR code with your mobile phone. Then it will appear as shown in the following image
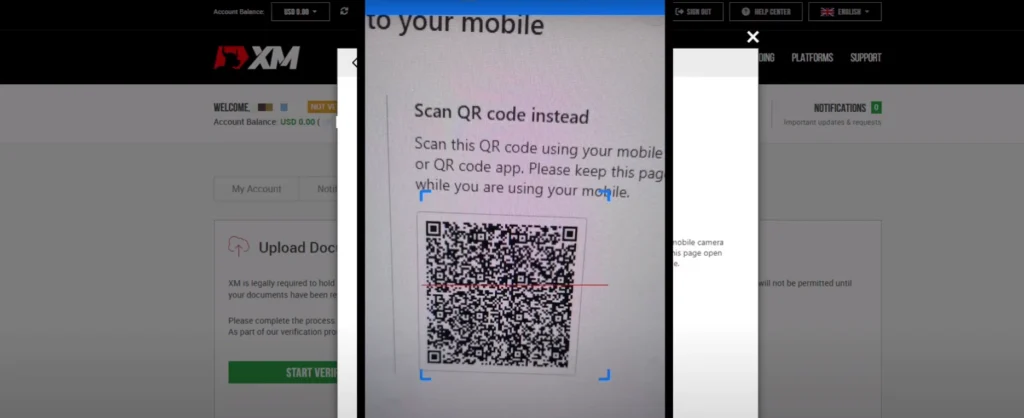
Then, a link will open as follows, and you need to click on it to continue. Then, you can continue and complete your verification process.
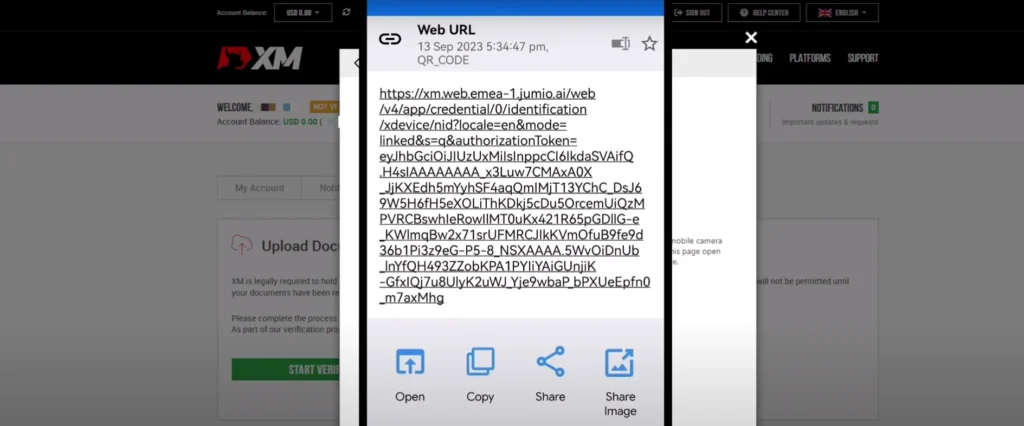
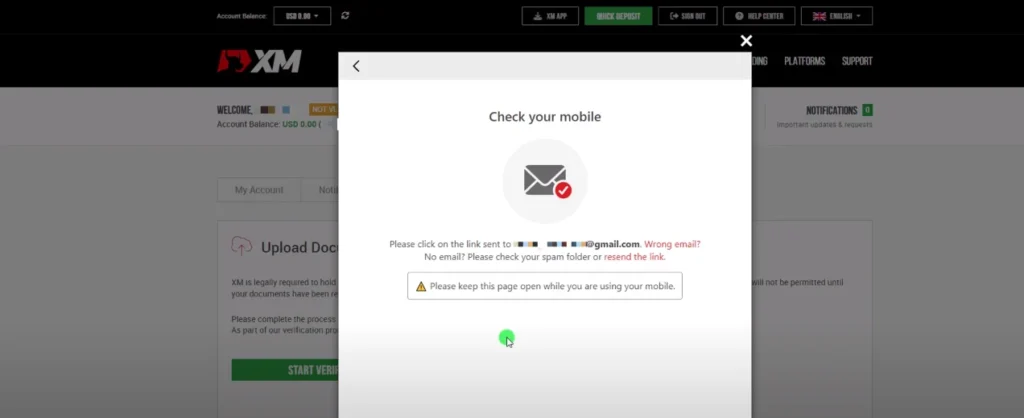
Step 7 : To send the link to the mobile phone via email, you can type the email and click the “Send” button

Step 8 :Once you send it, you will be notified to check the mobile, as follows
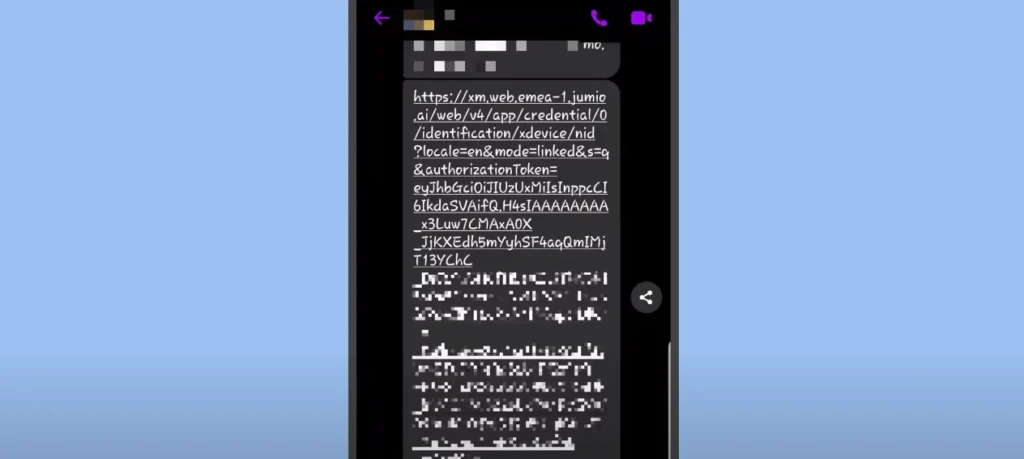
Step 9 : You will be able to see a link as shown below on your mobile phone. Click on that link
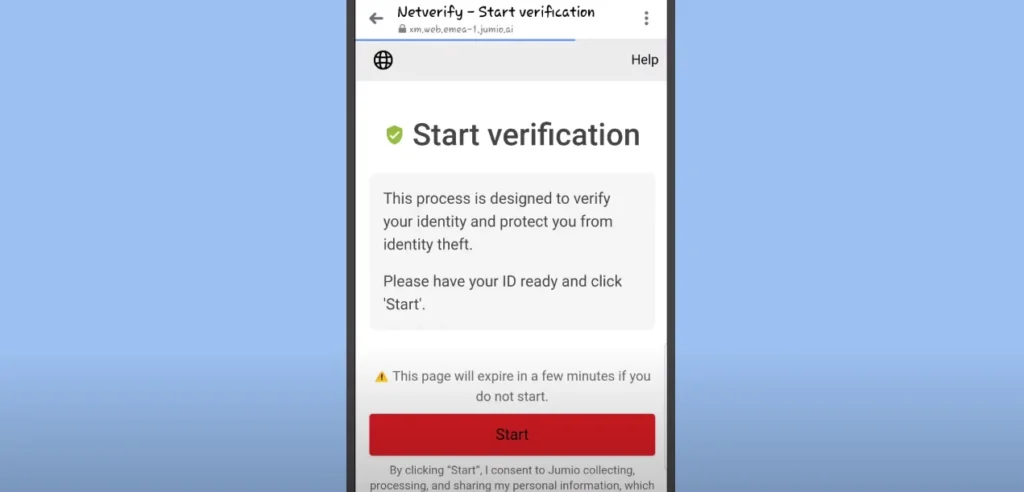
Step 10 :Then, you will go to the start verification page. Click on the “Start” button and wait for a few seconds
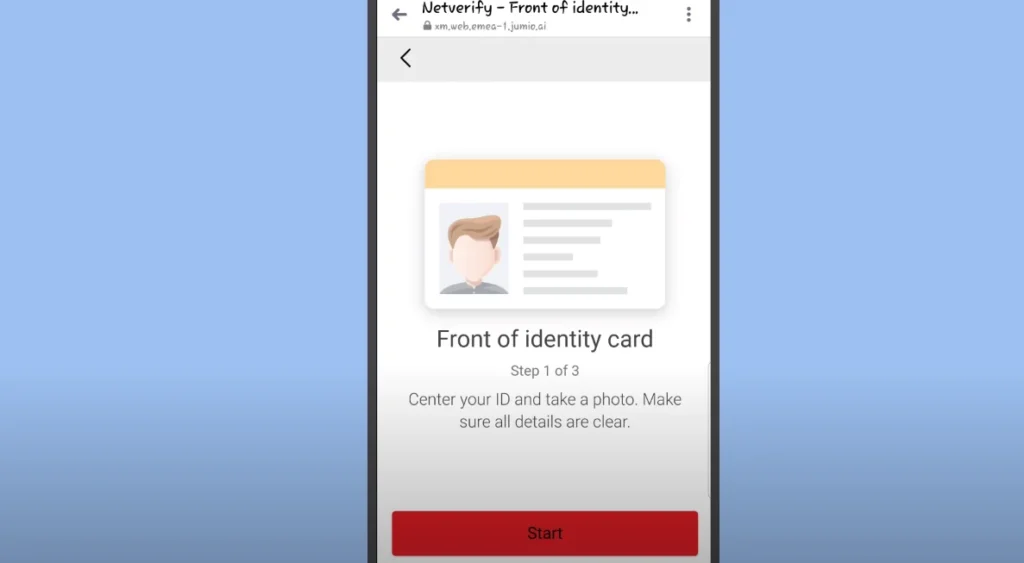
Step 11 : You will have another page called “Front of Identity Card.” Click on the “Start” button
Click “Allow” and then click on the “Allow” link again if you get a message, then wait
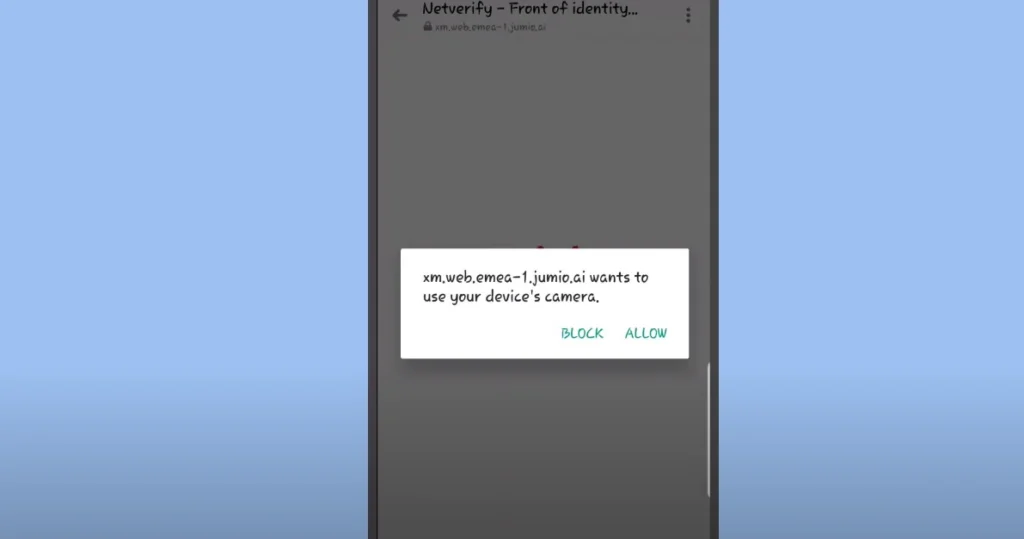
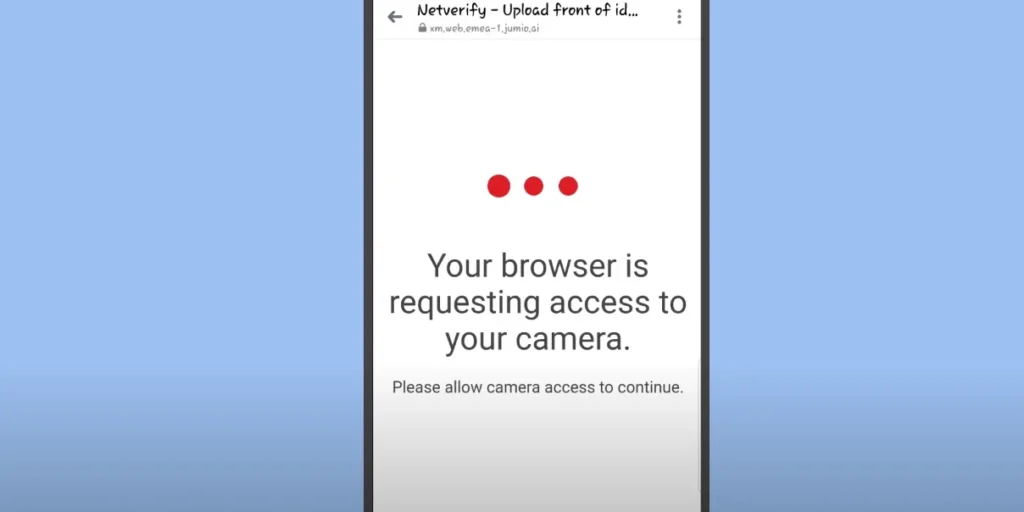
Step 12 : Then the camera will be opened, and you can take a photo of your ID front side. Once you’ve taken the photo, you can check it. If it’s not suitable, you can click on “Try Again” and repeat the same process.

If the photo is okay, click on the “Confirm” button
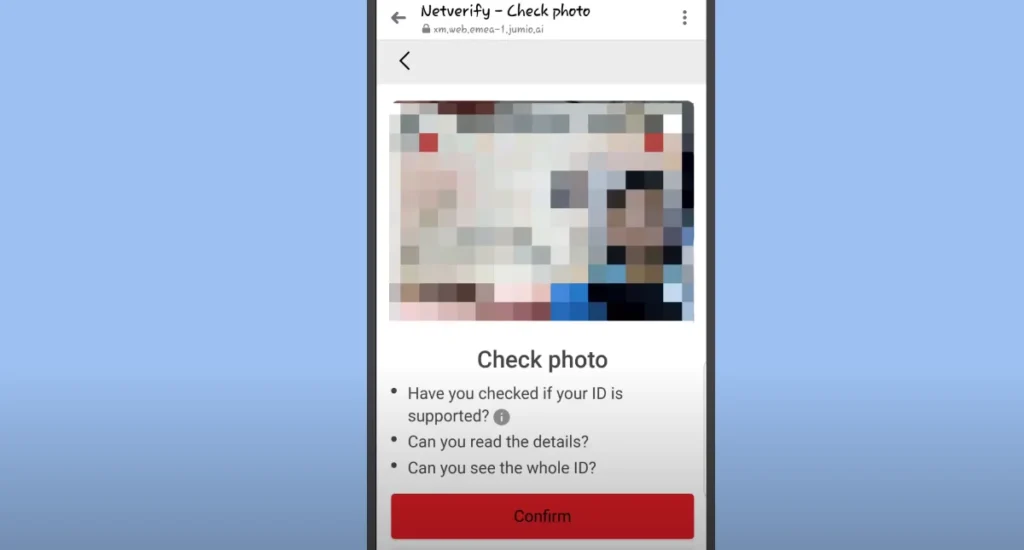
Step 13 : Then you need to submit the back side of the ID. To do this, you can continue with the same process as before.
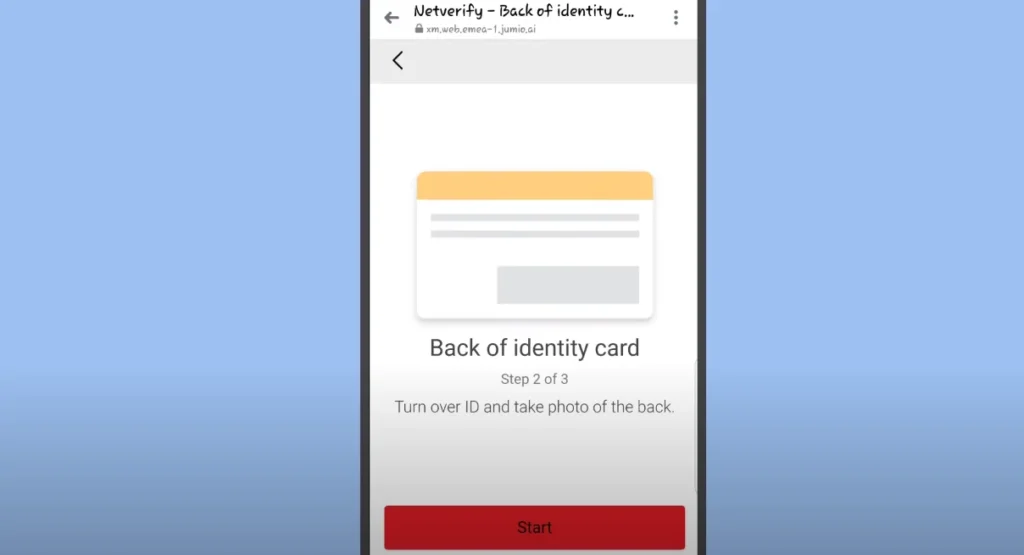
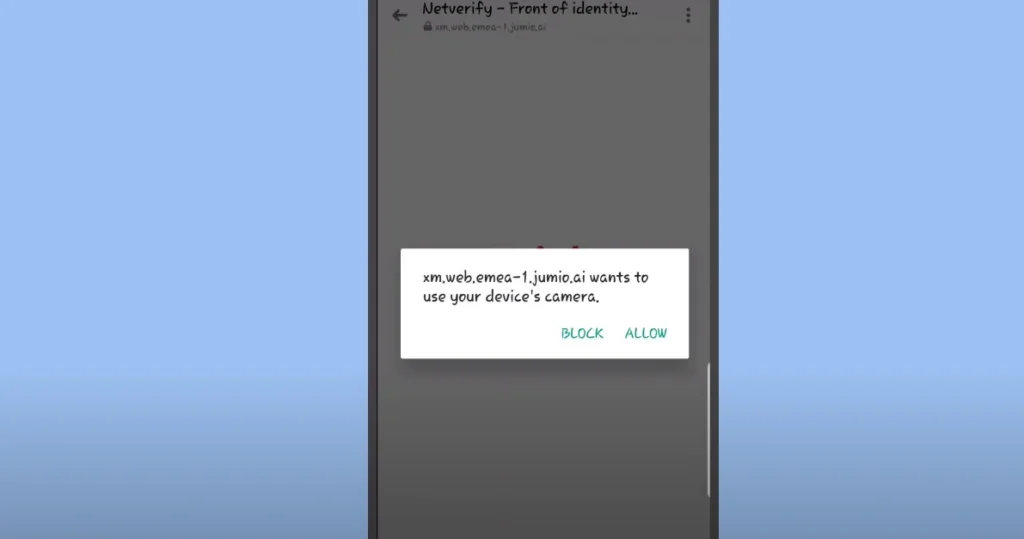

The above three images show similar steps for the front side submission of the ID. We believe you can easily follow these steps.
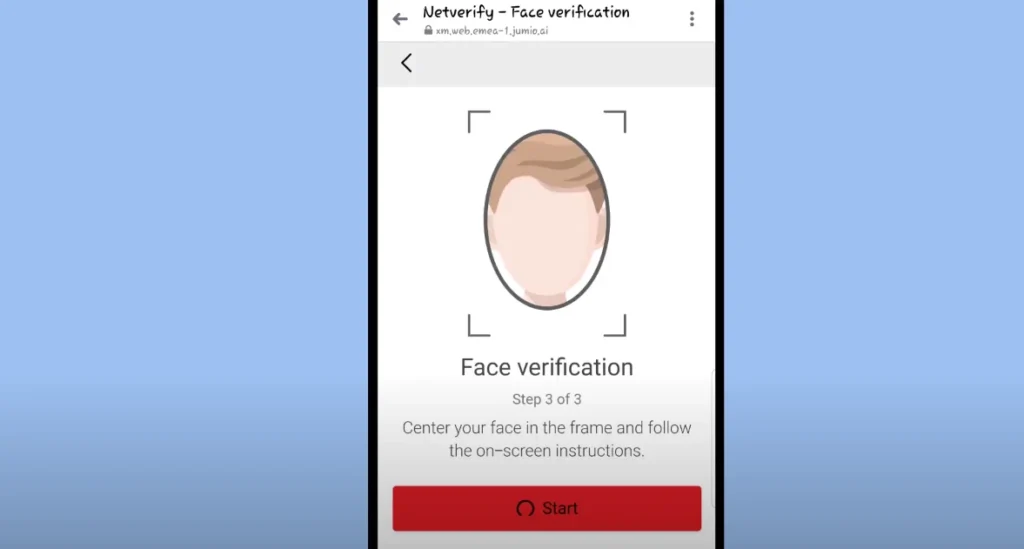
Step 14 : Now, you need to complete your face identification process. Once your face capturing is okay, click “Start” and wait a few seconds. Then, the camera will be opened, and you can take the selfie. After that, click on the “Submit” button. (See the following images).
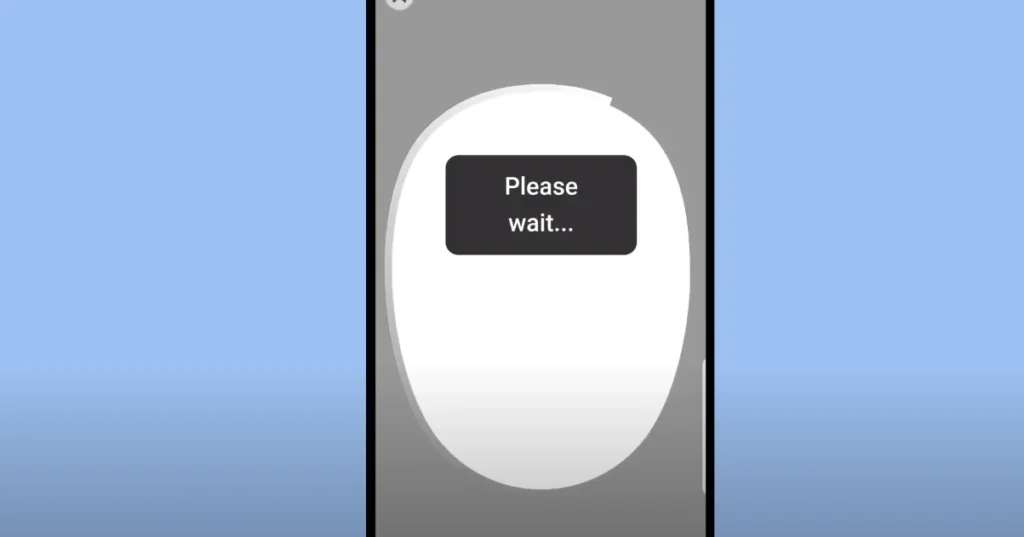

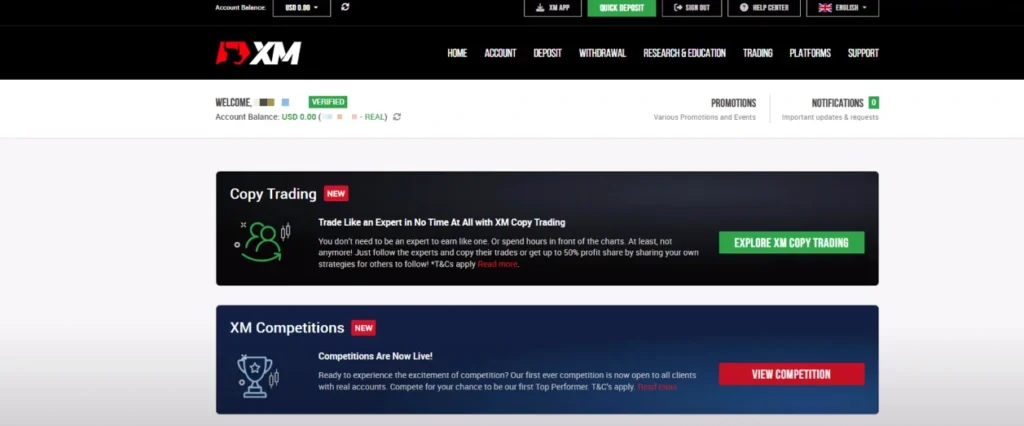
Step 15 : Now you have completed all verification processes related to XM broker. It may take some time to verify your account, perhaps a few hours or a few days. Once the account is verified, you can see a verified label in your member area, as shown in the following image
Verification Errors and Problems – Contact Us
If you have any issue regarding verification process , you can contact tradeszee support team via Contact Us page .we are here to help regarding any issue.
